Vegan Galley
  • Welcome!
  • Vegan Recipes
  • Maryland Vegan
  • The Latest Recipe
  • Get in Touch
  • Gabrielle's Yoga Website

Sauteed Kale Green Salad

5/28/2015

0 Comments

 
Picture
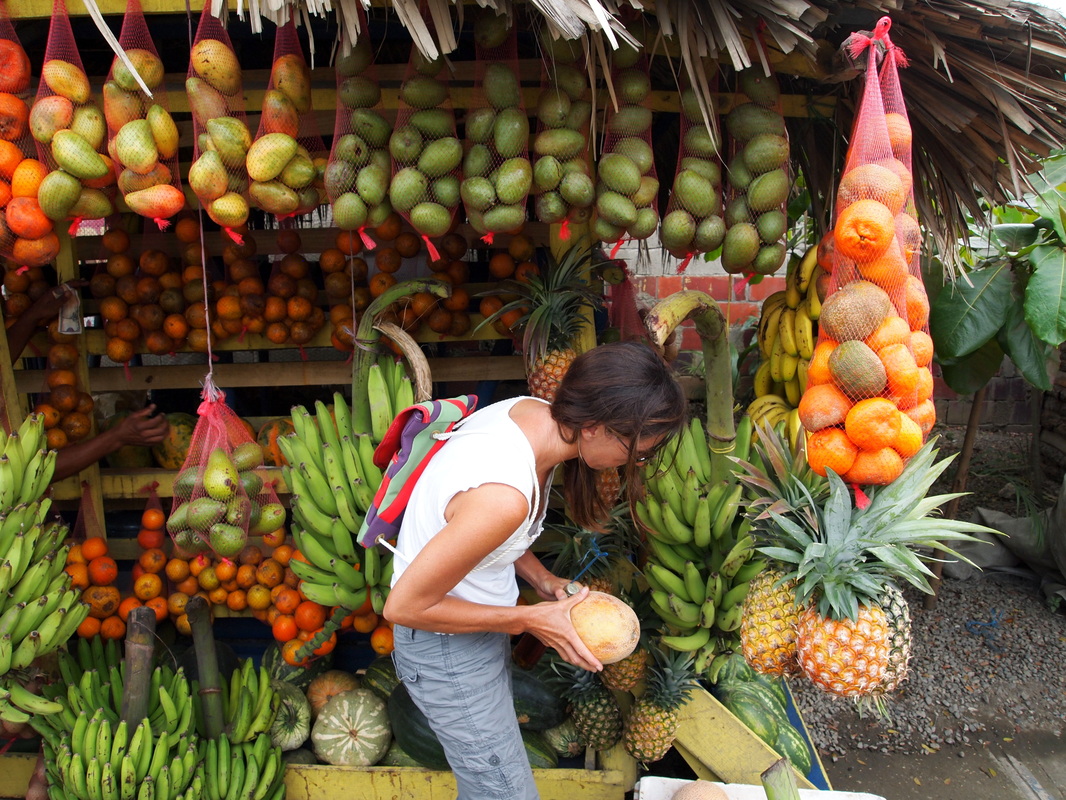
It's CSA time again! I happen to know that the crew at BaltimOrganic have been working super hard to have a great growing season. They have an awesome green house to grow all different types of lettuce and that is some of what we are getting in our first week! I love the fresh, organic lettuces! 

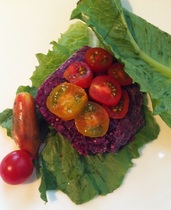
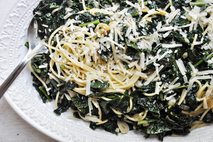
(actual recipe not pictured)


What you'll use from your bag:
  • Kale
  • Garlic Scapes (these look like green onion)
  • Spring onions
  • Salad turnips
  • Lollo Rosa &  Green Bibb Leaf Lettuces

First, Prepare:
  • chop  about 6 sprigs for garlic scapes and spring onions
  • cut the kale down to a size you would like for sauteing and eating
  • thinly slice a couple  salad turnips
  • prepare the other lettuces as you would like in a salad

Then, Salad Dressing:
 
You can use whatever dressing you want but I suggest something light and lemon based.
In a small bowl, whisk together: 
  • 1 T. fresh lemon juice 
  • 1 tsp. honey 
  • ½ tsp. balsamic vinegar 
  • ½ tsp. Dijon mustard 
  • Slowly whisk in 2 or 3 T. extra virgin olive oil until dressing thickens. 
  • Season with salt and pepper to taste

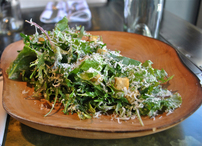
Next, Create the Salad Base: 

  • In a large bowl, combine the lettuce, radishes, and salad turnips
  • Toss in the dressing
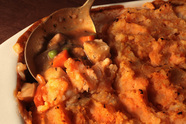
Nearly Finished...:
We are going to saute the Kale with the garlic scapes and spring onions in sesame oil (if you don't have sesame oil, you can use olive oil). 
  • over medium heat, heat just enough sesame oil to lightly cover your pan 
  • add the chopped garlic scapes and spring onion & saute for a couple minutes
  • add the cut kale & continue sauteing until tender and wilted
  • season with salt and pepper to taste
All together...:
  • arrange the prepared raw salad nicely in individual bowls 
  • top with the saute kale
  • add whatever else you like
  • Enjoy

0 Comments

Root Veggie Pie

10/3/2014

0 Comments

 
Picture
The recipe was a tough decision this week. So many good things to choose from our BaltimOrganic CSA! I've been feeling like a pot pie lately, I guess it's the cooler weather, and even though this isn't a pot pie it's a good variation to serve the craving.  If the list of extra ingredients seems like a lot, don't get discouraged- it's a fairy easy recipe. 

BTW the amount of veggies that I recommend using in the "what you'll use from your bag" section is based on the size of the stuff we get from our specific CSA so if you're following along with this during the CSA, this should be about accurate but if you're buying this stuff from the store you'll need less (about half)of these things b/c they will be bigger in size.

What you'll use from your bag:
  • Sweet Potatoes (4-5) You can substitute/add any potato if the CSA crop isn't enough
  • Carrots (4-5) Diced Medium 
  • Beets (2-3) Diced Medium
  • Choi ( handful)

What else you'll need: 
  • Mushrooms (1 cup)
  • Peas (1/2 cup)
  • Yellow onion (1/2 medium sized, chopped )
  • Celery Root (1/2 medium sized, diced - if available, if not don't worry about it)
  • Tomato Paste (2 Tbs)
  • All Purpose Flour (1 Tbs)
  • Soy Sauce (2 Tbs)
  • Olive Oil (2 Tbs)
  • Non-Dairy Milk or Yogurt (1/2 - 3/4 Cup)
  • Veg or Mushroom Broth (2 cups)
  • Thyme (1 Tsp)
  • Water (3 Tbs)
  • Salt, pepper, and cayenne to taste

First, Prepare:
  • If you wish, peel (or not) the potatoes. Cut them in 4ths to boil. Boil them in a large pot until tender. Drain, return potatoes to the pot and mash coarsely with the milk/yogurt salt and pepper. Then set aside
  • Chop onion, carrot, & celery root while potatoes are boiling. 
  • Turn on your oven broiler

Then, Make the Filling:
  • Heat Olive Oil in a large frying pan at medium heat, and add mushrooms & saute for about 5 minutes, then add the onion, salt and pepper and saute about 3 more minutes
  • Add diced celery root (if using), carrots, beets, choi, tomato paste, & thyme and stir to coat the veggies.
  • Add Veggie Broth and soy sauce & stir until incorporated. Bring to a simmer for about 10 minutes until the veggies are tender.
  • In a small bowl, combine the flour and water and stir until smooth. Then pour the flour mixture onto the veggies in the saute pan and stir to incorporate- simmer until sauce thickens, 2 minutes or so.
  • Then stir in the peas & season with salt, pepper, and cayenne to taste

Next, Combine Everything:
  • Transfer veggie mixture from saute pan into a baking dish about 8x10 or 3 quarts
  • Gently lay the sweet potato mash on top
  • Broil in the oven until the top browns & gets crispy- about 5-10 minutes

Enjoy!


0 Comments

Hooligan Pumpkin Soup

9/26/2014

0 Comments

 
Picture
I should admit that I have never made soup with Hooligan Pumpkins! Every week I write these recipes before we actually get the CSA bag but most of them I have an idea of what I'm doing :) But I'm excited to create something new.  Maybe you know what you're doing- if that's the case you can use this as a guideline. I got a few different ideas by checking out some recipes online.  Here we go...

This recipe is for 2 pumpkin bowls, if we can more pumpkins you can increase the recipe by the correct proportions.  

With the other great veggies we are getting, I'm planning a roasted beet and kale salad.

What you'll use from your bag:
Hooligan Pumpkins (2)
Garlic (1-2 cloves)
Onion (1/4 of a small onion, chopped)

What else you'll need:
Butternut Squash (about 1lb)
Veg Broth or Water (2.5 cups)
Butter (vegan)
Sugar
Thyme (fresh, 1 sprig)
Salt
Almond Milk (2 Tbs, optional)
Croutons or Pumpkin Seeds (optional, garnish)

First, Prepare:
  • Cut the top of the pumpkins and remove the insides
  • Sprinkle insides with a little sugar & salt
  • Put pumpkins and their tops on a baking sheet and roast for about 30 minutes at 400 degrees
  • Peel and Cut the Squash in about 1 inch pieces/cubes

Next, Make the Soup:
  • In a saucepan, melt 2-3 Tbs. of butter. Add the onion and garlic and thyme of the sprig and saute for 3 minutes or so (until onion is tender)
  • Put your cut up squash in the saucepan, stir to combine and cook for about 5 minutes- sprinkle with salt
  • Add 2.5 cups of Water or Veg Broth. 
  • Reduce heat & simmer for about 15 minutes until squash is tender

Then, Puree & Serve:
  • With an immersion blender (if you have one) puree the soup to smooth. If you don't have one you can transfer the mixture to a blender or mash with a hand masher for a chunkier consistency. 
  • Stir in the Almond Milk if using
  • Gently scoop the soup mixture into the pumpkins
  • Garnish with croutons or pumpkin seeds & serve

Happy Eating!


0 Comments

Potato & Squash Soup

9/19/2014

0 Comments

 
Picture
I'm back on the CSA recipe task- I'm sorry there was a long hiatus; I hope everyone made it through!  With the official end of summer this weekend I was inspired to create a soup recipe with our CSA goodies this week.  Because I have not yet made this exact recipe and do not know the size of the squash & potatoes, you will have to eye ball the measurements and use this recipe as a guideline.  I added carrots and apple to this soup for a tad of sweetness but they are not necessary if you're ready to cook and don't have them lying around. This is not a challenging recipe to make and will likely take about 45 minutes total from start to enjoying. Here we go...


What you'll use from your bag:
  • Acorn Squash 
  • Kennebec Potatoes 
  • Garlic (chopped)
  • Onion (chopped)


What else you'll need:
  • 1 Apple (recommended but optional)
  • 2 Carrots (recommended but optional)
  • Veg. Broth (or half broth half Almond Milk)
  • olive oil
  • Cinnamon
  • Cardamom (if you don't have it, you can skip it)
  • Salt & Pepper 

First, Prepare:
*You are going to use about the same quantity of squash and potato. Don't forget that the inside of the squash yields less than the outside :) And if it's not exact, no big deal.
  • Cut the squash in half, remove the seeds, and put it on a baking pan brushed with olive oil *leave the skin on, it's easier to take it off after roasting. 
  • Sprinkle the squash lightly with cinnamon, cardamom, salt, & pepper and roast in the oven at 375 until the inside is tender- maybe 20 minutes

Next:
  • In a large pot, saute about a 1/4-1/2  cup of chopped onion & 2-3 cloves of garlic for a couple minutes
  • Peel & cut the potatoes in halves or fourths so they are 2-3 inches approx & add them to the pot
  • Peels & cut the carrots and apple (if using) and add them to the pot as well
  • Pour in enough veggie broth to cover everything plus an inch or so
  • Bring to a boil & check for potato tenderness after about 10-15 minutes


Then:
  • Remove the roasted squash from the oven and scoop out the squash from the skin (careful, it's hot); add it to the pot with everything else- it doesn't need to be pretty b/c you are going to puree it anyway
  • Stir everything together and check for tenderness of all the veggies

Finally:
  • With an immersion blender, puree everything together until creamy. If you don't have an immersion blender (like I don't) you can use a regular blender. Or, if you like it more chunky you can use a hand masher to mash everything together right in the pot (I've done this with other soups & it's great)
  • Taste for flavor and consistency and add more broth and spices if desired


Enjoy

0 Comments

Raw Tomato Vegetable Soup

8/7/2014

0 Comments

 
Picture

Holy Tomato!  This recipe won't come close to touching the mass amount of tomatoes we have the pleasure of receiving from BaltimOrganic. But it's a nice refreshing soup. I didn’t come up with this myself; it’s a variation of another great recipe from my yoga teacher Dharma Mittra.  It has the taste of energizing food!

The following recipe makes 4 small appetizer size soups (shown in photo)

What you’ll use from your bag:
-2 medium tomatoes, chopped 
-1 cup cucumber, cubed
-1/2 cup zucchini, cubed
-1/2 cup cubed bell pepper (any color)

What else you'll need:
-1 medium avocado, halved
-1 cup spinach
-1/2 cup basil
-1 lemon, juiced
-4-6 (4 if they are big or 6 if medium) dates, soaked 

 
What’s Next:
-Put aside half of the zucchini, half the avocado, and about a fourth of the tomato
-Put everything else in a food processor and blend until creamy
-Chop the ingredients you set aside 
-Distribute the soup into small bowls adding the chopped zucchini, avocado, and tomato into each


0 Comments

Pico de Gallo

7/26/2014

0 Comments

 
Picture
When I saw the list of veggies this week I immediately thought salsa! So here you go, a refreshing snack and crowd please-er!  

Many of you can figure out on your own how to turn our ingredients of the week into a great salsa/pico de gallo. So, go for it- below is just a guide! By the way, the difference between the two is generally that salsa is more liquid-y while pico de gallo is chunky and less "wet" and typically includes ingredients like corn- and in this case zuchinni!  You can use the same ingredients to make salsa by not de-seeding the tomatoes. There is some tasting that should take place during the making of this creation to get it to your liking! If you're not sure if you will like one of the ingredients in the mix, just add a smaller portion. 


What you'll use from your bag:
  • Tomatoes (de-seeded, ~1 cup chopped)
  • Leeks (~ 1/4 cup, chopped)
  • Peppers (1)
  • Corn (1 or 2 ears from the stalk)
  • Zuchinni (~1/4 cup, chopped)

What else you'll need: 
  • Lime
  • Cilantro (optional)
  • Salt & Pepper to Taste

Serve with chips or over a salad with your CSA lettuce! 

First, prepare:
  • De-seed a bunch of tomatoes (depending on how much you want to make) and chop them into small pieces- set them aside in a medium size mixing bowl
  • De-stalk the corn (no need to cook it) 1 or 2 ears and add it into your bowl
  • Chop the leeks as fine as possible then add to the bowl
  • De-seed and finely chop 1 poblano pepper and add to the bowl
  • Chop the zuchinni in small squares and add to the bowl

Then, combine:
  • Squeeze 1/2 lime over the mixture
  • Add finely chopped cilantro (if using)
  • Gently combine the ingredients by hand or spoon
  • Season w/salt and pepper to taste


Enjoy with friends! 

0 Comments

CSA Veggie Burger

7/18/2014

0 Comments

 
Picture
It's summer and burgers are popular among carnivores but you don't need to eat meat to enjoy this heavenly patty.  If you've never made a veggie burger before let me tell you something I've learned from experience- you cannot mess this up! I could pretend that I'm creating something miraculous here but seriously, all you need to do is shape some pureed veggies into a round shape that will fit on a bun.  This is the first time I've ever used string beans (if you are like me, you might have though- what in the world am I going to do with all these string beans!!) and zucchini/squash to make a burger but that's what we got so I figured what the heck, I'll give it a shot and see what happens. By the way, that's my approach to trying a lot things :-)  

One more thing before you get started....sorry, but this burger (and most veggie burgers) do not do well on the grill- they just don't stay together. You could put them on a veggie grill tray on the grill or cook them in a pan on the stove.  The natural juices of the veggies & pureed squash will keep this together along with the chilled rice or quinoa- make sure you chill the rice/quinoa before adding it to the burger- otherwise it will not stick as well. Also, make a bunch- they freeze well!

The photo is of my creation but I was so focused on eating it I forgot to take a picture of it on the bun with all the dressings!  So after I ate I remembered and took a photo of a patty before cooking.
This recipe makes 6 burgers.  

What you'll use from your bag:
  • Summer Squash (at least 1 cup cut coarsely in chunks)
  • String beans (fist full)
  • Onion (1/4 of a medium size onion, chopped)
  • Garlic (2 cloves, chopped)
  • Leeks (1/4 cup chopped-optional, if you have any left from last week)
  • Beets (1/2 cup pureed -optional, if you have any left from last week)
  • Turnips (1- optional, if you have any left from last week)
  • Tomato (to put on top)
  • Cucumber (to put on top)
What else you'll need:
  • Quinoa or Brown Rice (1/2 cup, cooked & chilled)
  • Burger Buns
  • Any other dressings you like for your burgers- I like avacado, sprouts, & spicy brown mustard
  • Olive Oil  (splash)
  • Salt & Pepper to taste
First, Prepare:
  • Cook the quinoa or rice and chill it immediately- put it in the freezer to speed it up if you are trying to do this in one shot
  • Saute the garlic, onion, and leeks (if using) in a pan with a splash of olive oil- remove & set aside in a medium mixing bowl
Then, puree:
  • Puree the squash until it is smooth, put in the bowl with the garlic/onion saute
  • Puree the string beans, beets, & turnips (if using)
  • Puree the cold rice or quinoa and add to the bowl
  • Combine everything together with your hands and form into patties
  • Season with salt & pepper if you like
Finally, Cook:
  • Heat a splash of olive oil in a pan and add your burgers, cook a few minutes on low/medium heat (if the heat is too high all the little particles of veggies & quinoa will burn.) Be a little gentle when flipping- if then ends fall part, they can easily be formed back together with your spatula :)
  • Serve on toasted buns with your cucumber, tomato, and whatever else you are using.
  • Enjoy!


Namaste

0 Comments

Green Vegetable Curry

7/11/2014

0 Comments

 
Picture
Hi everyone! We are coming up on week 7 of BaltimOrganic CSA.  I have been wanting to make a curry, waiting for the right mix of veggies to come along, and this week we have a mix that will work- and they are all green, hence the name :-)

It can be really easy to make a Thai style curry or you can choose to go the route of mixing spices yourself which takes some time.  I've done both and many things between. The easiest thing to do is buy Thai (the brand) green (or red) curry paste in a jar and follow the directions mixing it with coconut milk and adding the vegetables.

The vegetable proportions are really to your liking and you can add more or less- whatever makes sense.  This recipe will make about 4 servings.

What you'll use from your bag:
  • Zucchini (2 -4 cut in chunks)
  • Green Beans (large handful, cut in half)
  • Leeks (2 stems, chopped about 1/2" wide)
  • Onion (sweet walla walla) (cut in 1/4 or 1/8 depending on size & separated)
  • Kale (optional) (broken in salad size pieces)
What else you'll need:
  • Coconut Milk  (1 can)
  • Thai curry paste (if going the simple route) or use this curry recipe I posted previously
  • Jasmine Rice (prepared)
  • Olive Oil (just a splash)
First, Prepare:
  • Begin cooking the rice according to the instructions with the rice you have
  • Saute the onion and leeks in a splash of olive oil for a few minutes- remove from heat and set aside
Next:
  • Prepare the curry using the instructions on the curry paste jar
  • Add the vegetables listed above including the sauteed leeks, onions, and kale (if using)
  • Allow to cook about 10-15 minutes on low/medium heat (or until the veggies are tender but not overcooked)
Finally...:
  • Serve your creation over rice
  • Enjoy!

Namaste

0 Comments

Zucchini & Beet Tart

7/3/2014

0 Comments

 
Pictureborrowed photo, not actual recipe
Happy 4th of July! I hope everyone has a great day celebrating our Independence! 

For some reason I'm extra excited about this weeks recipe. My inspiration for this was a recipe from "fine cooking." It's somewhat of a unique idea, sort of like a refreshing flat bread- a nice summer meal, maybe I'll even have it with a glass of wine (it must be holiday! :)) Our zucchini is fatter than the kind we can buy in the store and that will work great in this recipe.

I think I mentioned in a previous week that I love beets; if you don't you can leave them out of this recipe (like the photo.) 

What you'll use from your bag:
  • Zucchini (about 3-4 zucchinis, cut in thinly sliced rounds)
  • Beets (1 or 2, shredded- raw)
  • Garlic (roasted, directions here)

What else you'll need:
  • All-purpose flour (1-1/4 cups)
  • Cold Vegan Butter (2/3 cup)
  • White vinegar (1/2 tsp.)
  • Cold Water (3 or 4 Tbs.)
  • Olive Oil (2 Tbs.)
  • Salt & Pepper
  • Cashew Nut Cheese (see recipe here)
First, make the dough:
  • Place the flour, cold butter, and a little salt in a food processor and mix/pulse until the butter is in small pieces
  • Add the vinegar and cold water and continue pulsing until the dough forms
  • Shape the dough into about a 1 inch thick disk, then wrap in plastic and place in the fridge for 30 minutes (look to the next section for preparations while you are waiting for the dough)
  • Roll the dough onto a floured service into an 11 inch round, transfer to a backing sheet or pizza pan; then cover with plastic and refrigerate another 30 minutes (or until you are ready to use it)

Next, more preparations:
  • Roast the garlic (recipe from last week, here, at the bottom of the page)
  • Toss the zucchini rounds with 1/4 tsp of salt and place in a strainer, let sit & drain for 30 minutes
  • Prepare the cashew nut cheese (recipe here)
  • Preheat oven to 400
  • Process 1 or 2 roasted garlic cloves with the cashew cheese in a food processor

And then...:
  • With your hands squeeze the zucchini to release all the water, then place in a bowl and toss with 1 Tbs. of olive oil and some dashes of pepper.
  • Remove the dough from the fridge and bake for 30 minutes
  • Spread the cashew cheese evenly on top
  • Then arrange the zucchini in overlapping circles (like the photo) 
  • Drizzle the remaining 1 Tbs. of olive oil on top
  • Bake for an additional 10-15 minutes or until zucchini is slightly browned

Finally...:
  • Remove tart from oven. 
  • Top with dollops of shredded raw beets
  • Cut and Enjoy


Wishing you a safe and happy holiday! Namaste


0 Comments

Braised Kale & Roasted Garlic

6/27/2014

0 Comments

 
Pictureborrowed photo
Hi everyone! This week we are getting a mixed bag, and still a bit in the air as to the mix at this point.  I know Jon and the farm team have been working hard and I'm sooo grateful for what they do. Especially because it's not my wheelhouse; I like to eat the food- growing the food is something I haven't taken to as of yet :-)  It's a great reminder of how our separate interests can benefit a community. 

This week's recipe is simple and wonderful. It includes garlic- which if you've read other things on my site you may have noticed is not part of a "yogic diet" and it's something I typically don't eat. I'm addressing this b/c I've received questions from a few people about it...garlic falls under the category of "rajasic" (an active quality) food. That means garlic can be disturbing and create over activity in your mind.  If you have a fiery nature already (your mind/body constitution) you may find yourself more fiery or agitated.  It's probably important to note that a "yogic diet" is to facilitate a calm mind that can rest in meditation. And I'm fully aware that the majority of people out there won't change their eating due to this knowledge, which is totally cool by me- I'm not saying you should, just providing information :-)  Garlic does have health benefits and can also be used for medicinal purposes.  So, lets get on with the recipe!


But first, something we are getting that is not in this recipe is Hakurei Turnips.  They are sought after and considered a delicacy by chefs. These are best to be eaten raw with your lettuce in a salad. 

What you'll use from your bag:
  • Garlic Bulb (roasted, directions below) (1/3 bulb)
  • Spring Onion (2-3 sprigs)
  • Kale (1 bunch)


What else you'll need:

  • Olive Oil (1 Tbs.)
  • Veg. Stock (1/3 cup)
  • Fresh Thyme (optional) (1 tsp.)
  • Salt & Pepper to Taste
  • Serving Options...
  • Cooked white beans or chick peas 
  • Spaghetti noddles
  • Garnish with Vegan Parmesan cheese

First, prepare:
  • cut or break the kale in salad or bit size pieces
  • chop spring onion
  • chop thyme (if using)

Next: 
  • heat olive oil in a saute pan and saute the spring onions (1-2 minutes)
  • add the kale and veg stock and continue sauteing until kale is tender (10-12 minutes)
  • add about 1/3 the roasted garlic bulb (roasting directions below) by squeezing the meat out of the garlic head and stir to incorporate
  • add thyme (if using)
  • add beans or pasta (if using)
  • season with salt and pepper
  • Sprinkle with Parmesan cheese (if using)
  • Serve

Happy Eating!

Roasted Garlic Directions...
  • Trim off the stem of the blub to expose the inside
  • Preheat oven to 375°F
  • Drizzle garlic heads with olive oil and a bit of salt
  • Wrap in parchment paper and then in aluminum foil 
  • Bake for 45 to 55 minutes until garlic is tender and starting to come out of it's skin.
  • Cool before handling
  • To use garlic, squeeze the garlic meat out of the skins and add to your recipe.

* you can keep roasted garlic in the fridge for a few days


0 Comments
<<Previous

    Archives

    May 2015
    October 2014
    September 2014
    August 2014
    July 2014
    June 2014
    May 2014
    February 2013
    January 2013
    November 2012
    October 2012
    September 2012
    August 2012

    Categories

    All
    Appetizer/Snacks
    Bread & Brunch
    Burgers
    Caribbean Esque
    CSA
    Desserts
    Indian Inspired
    Mexican Maybe??
    Pasta/Noodles
    Pitas/Sandwiches/Wraps
    Pizza
    Raw
    Salads/Dressings
    Soups/Stews
    Thai A Little
    Thai-a Little
    Winter Holidays

    RSS Feed

    Picture
Powered by Create your own unique website with customizable templates.